
A very kind person was donating all sorts of materials to make miniatures and among the items were paper covered stem wires and waxed threads. I have been wanting to make a miniature wicker item for a while but had no idea what. Then I came across this:

I thought it would be fun to make so I tried creating one in 1/12 scale.
Here was my draft.

I started by taking basswood and tracing the bed shapes, one being slightly smaller then the other. Then I varnished the wood and drilled 33 holes on the big base shape leaving a space for 4 stems in the front without holes (The first holes on each side need to be bigger for the door arch) and 37 holes on the smaller bed shape (all holes need to be bigger for easier threading later -lesson learned...)
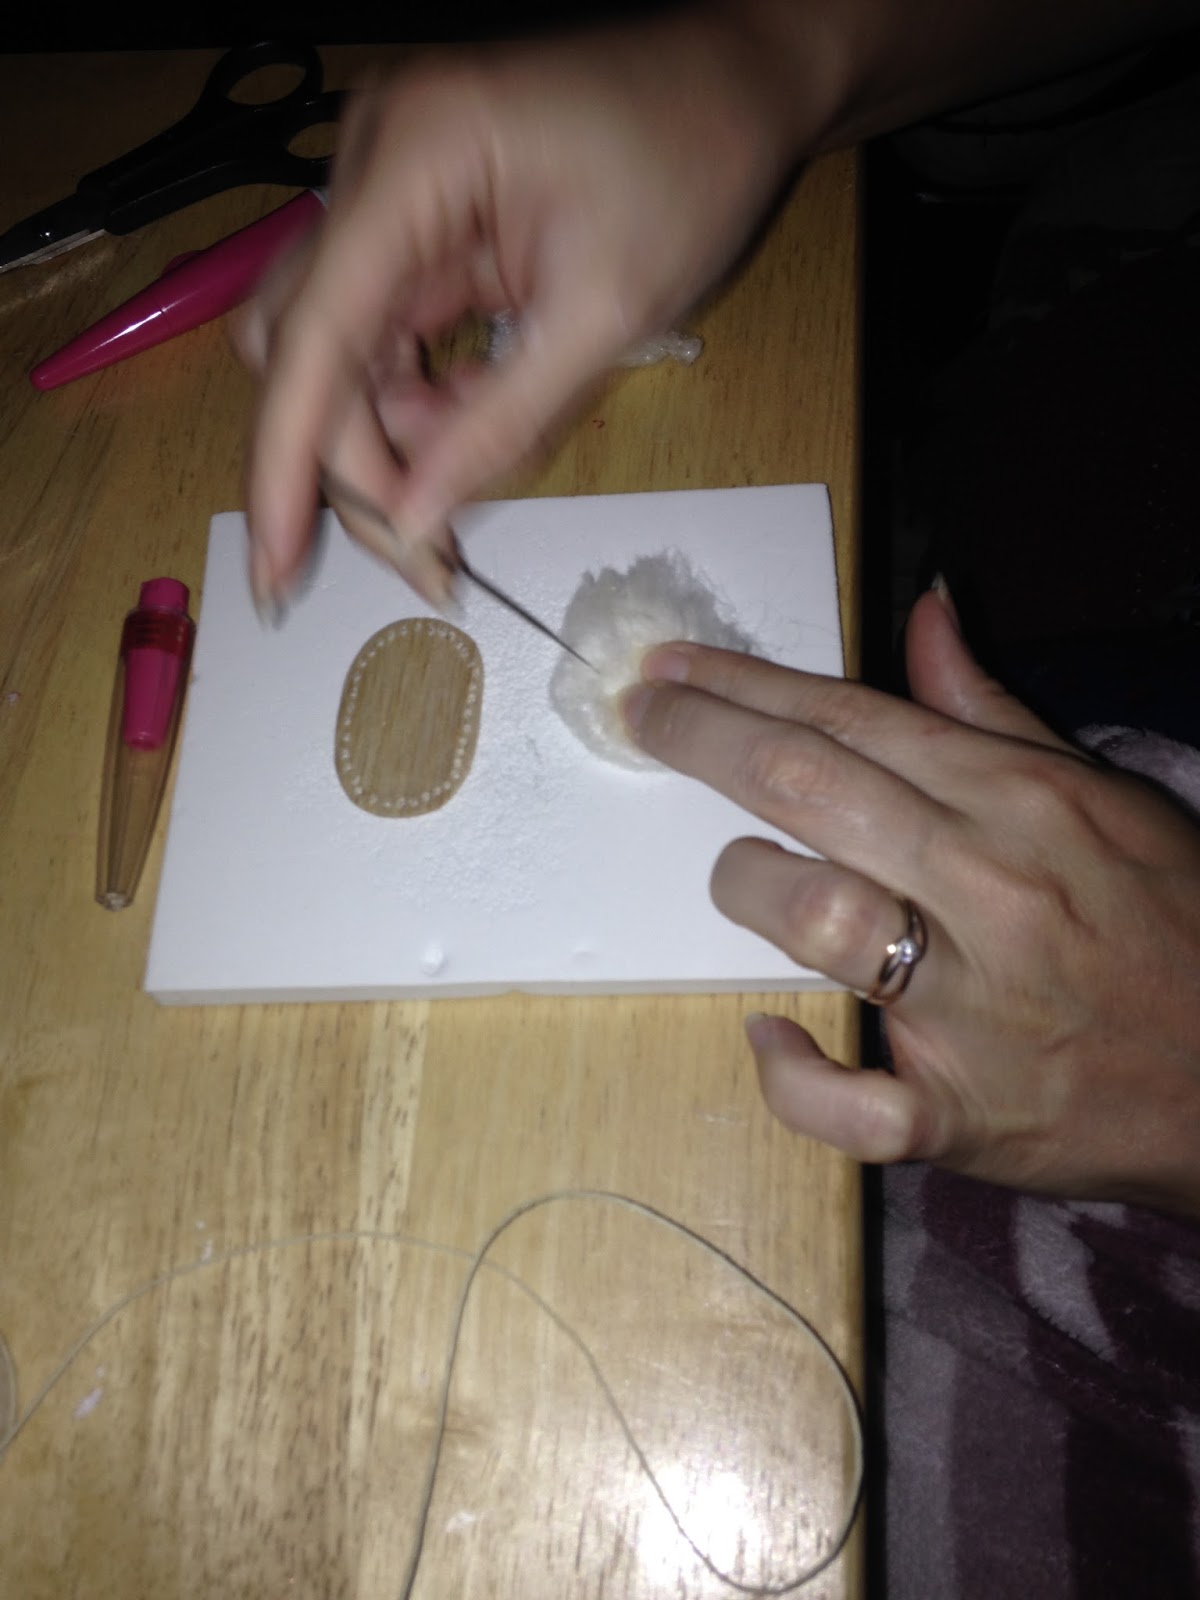 |
| Once the bed shapes were traced, cut, sanded, varnished and drilled, I started felting a cushion to fit the bed with wool and a felting needle on a foam base not to damage the needle. |
 |
| Gave it shape by felting all around |

For the bed cushion, I felted the wool to make it take a thin oval shape. Then I felted 6 holes in the cushion. From these holes the shape appears. Then I did the same thing for the smaller cushion.
 |
| With the holes to create shape Now I have my basic shapes and 2 cushions. I measure my stem wire and cut them. I need 37 pieces of 2'' long for the basket and 1 piece of 4'' 1/2 or 5ish'' for the door -the 4''1/2 makes a little door for kittens) I paint all the 37 stems in titan buff acrylic to match my thread. I then glue 33 stems to the bigger base. Leave aside 4x2''stems and the long piece for the door. While I let the stems on the base dry, it's time to work on that door. |
 |
| and twist |
 |
| I take the 4''1/2 stem and fold it in half |
 |
| then I give it the correct shape. |
 | ||
| I insert 4 stems in the many spaces created from the twist. I secure each one in place by folding them very close to the base. I only made the stem go out of the arch for 1/8 of an inch then folded. After that I took the wax thread and covered the arch only. I secure the ends with glue but I make sure that there is a small part of the wire on both ends that is not covered by the tread so it can fit in the drilled holes.  This is what it would look once it is in the base. It is not glued. Being a bit new to weaving, I made a mistake. I took the thread and glued the tip to the base then started weaving. At first I glued the arch and weaved 1 row. When I arrived at the arch I couldn't weave without having to remove the arch each time to put the thread across.  While working I noticed I had to raise the arch base every time I met the end of a row...
|

 |
| I measured and cut 2 additional stems 2" and folded each in half and twisted them |
 |
| Then I glued waxed thread around so it imitates the arch making sure I leave some wire exposed at the base so it fits in the drilled holes from the base -As you can see I forgot to leave some wire exposed on the picture so I exposed the wires on the bottom of each afterwards... |
 |
| I placed them in the base without gluing them down because I will need to remove them later.After that, I weaved to my hearts content. Going backwards each time I met the end of the row. |
When I reached 18 rows (I checked holding the arch next to my work and stopped when the thread would reached the first wire on the arch-see bottom image) I removed the two temporary stems and carefully transferred the row of folded thread to the arch piece doing 1 side at a time- (There must be an easier way then that but I don't know yet-sorry... If anyone knows another way to do that, I would loooooove to hear from you because transfering the thread is kind of tricky...

Now I picked up where I left, When the 1st row was done and I met the first stem from the arch, I weaved the first stem then instead of continuing across, I went backwards and I did the same on the first stem of the arch on the other side. Once that is done, I simply weaved in a continuous circular motion till I reached the desired height. I made it go 31 rows from when the arch was put in place (49 rows in total from the base) I know nobody weaves the same and there might be a difference in the size of the thread so just make it till it reaches the height you want. I my case, I made it go 1 inch high. I gave it a rounded shape by folding the wires.
 |
| Before I placed the second base, I put the cushion in the bottom bed. |
 |
| shaping the wires in a curve all around |
 |
| shaping. |
 |
| the row is carried to the middle back, ready for second base to be inserted. |
 |
| thread has to stick out from the bed. |
I stopped the row in the back halfway and made sure it was sticking out of the bed. I glued the top of each stem to keep the paper from peeling, to make sure I wouldn't have trouble putting the top bed. I take time to carefully align each hole with each stem and push the bed base in and make sure it is levelled.
 |
| securing the top of the paper stem with Tacky glue. |
Once the base is in place, take the thread and start to weave over the top base in a circular motion.

 |
| I cut the front wires so they are shorter in front and bigger in the back and gave it the shape I wanted. |
I weaved accross. Each time a thread was too short to carry the row, I would simply go backwards and do it from left to right till I reach the end of my work. I glue the thread to the back once its done.
 |
| Going backwards each time a stem was too short to continue. |
 |
| Almost done |
I measured 3 threads of 6 inches each, made a braid and glued it to hide the base in the center.


I measured and cut 3 other threads of 7 inches long and braided them to glue it to hide the base.
I measured and cut 3 threads of 10 inches long each to glue on top of the cat bed. (leaving plenty of extra thread in case)
 |
| Wouhou! Finished! |
A miniature felted kitten is checking it out...


Hope to see you next post:)
No comments:
Post a Comment